Email Class Lists to Parents
Public/School/Mass Email/Class List Landscape Mass Email to Parents
Class lists can be emailed out to parents. It's a nice service to the parents that many schools choose to do before the start of the school year.
 |
Tip:
Always do a test run before sending the lists en mass to all the parents to confirm that the lists are being sent out correctly. |
1. Open the Query Builder.
2. Navigate to the report Public > School > Mass Email and select the report Class List Landscape Mass Email to Parents.
3. Set up the report:
-
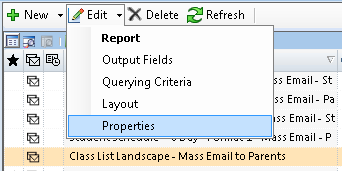
Go to Edit > Properties
-
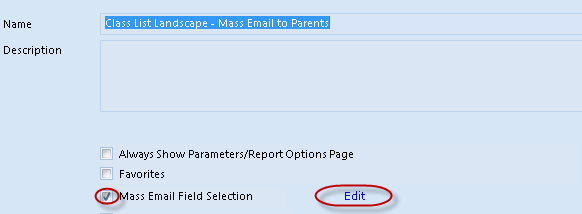
Confirm that the Mass Email Field Selection is selected and click Edit.
-
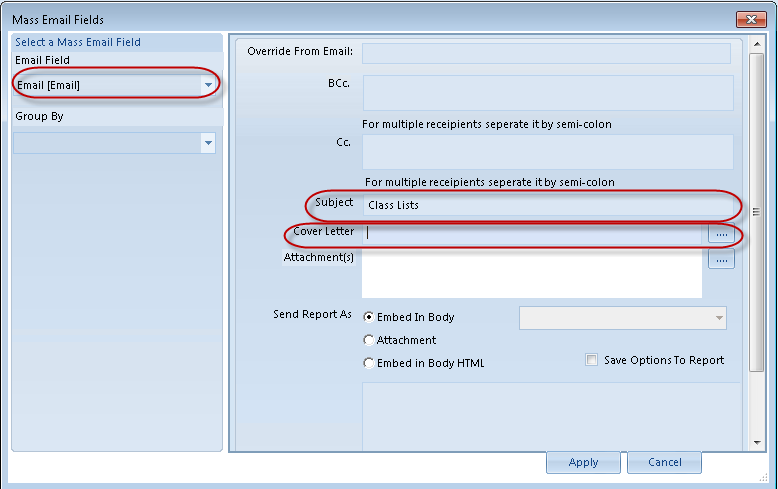
Update the values
-
On the left, Select a Mass Email Field, select Email (email).
-
Enter any applicable BCC or CC email addresses.
-
Subject - enter a subject for the mass email.
-
Cover Letter - select the cover letter. The cover letter will be the body of the email. It must be in .html or .htm format.
-
Attachment - select applicable attachments. The attachments should be in pdf format.
-
Select Apply.
-
Select Save to save the report settings
4. Run the report, by selecting Preview and entering the applicable prompts.
 |
Note:
The report is set up with criteria to only run for the homeroom class. The report also includes criteria to exclude children and emergency email addesses so the students and emergency contacts do not receive the class lists. The prompt for the emergency address type to exclude should be updated to reflect your address code. 
|
5. On the Options tab of the criteria, select the correct Location which will print on the class list.
6. Select Done.
7. The preview box will appear with a list of the emails that will be sent. It may take a while (up to 30 minutes is in the normal range) to finish going through the list.
Select/deselect accounts in the Send Email column.
A test email can be sent at this point by filling in override recipients on the Override Recipients tab. See send test email.
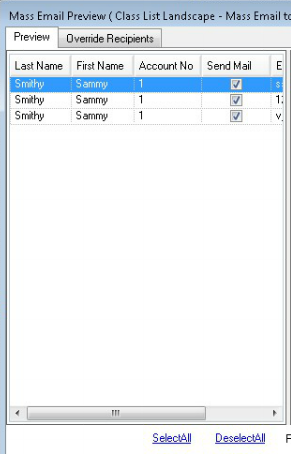
Select OK.
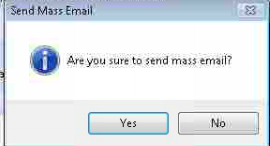
8. Select Yes in the confirmation window to send the emails.
9. The emails will be generated. It may take some time for them to be completed and the progress of the emails being sent can be viewed in your 360° application's MassEmail folder.
A progress bar will show the emails being sent out as well.
10. Select OK when completed.


