Importing Lockers
The locker import facilitates the data entry process by importing a list of lockers for students instead of manually adding it to each student individually.
1. Log onto the Staff Portal.
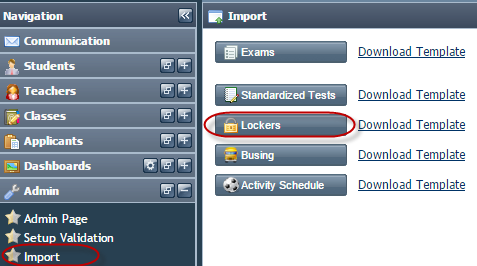
2. Navigate to Admin > Import.
3. Select Lockers.

4. Select Download Template to download the file template in which to enter the locker data to import.
The file must be saved in .csv format (it can be opened in excel).

5. Enter the locker information:
|
Field Name |
Explanation |
Required |
Code Must Preexist in Codes Setup. |
|
Amfid |
Person id (can be found on the Demographics > People panel). |
Yes |
|
|
Locker Code |
Student’s locker number, or locker type (GYM, HALL) |
Yes |
Yes Tools > Codes Setup – School – Student – Lockers - Lockers |
|
Serial Number |
Serial number of the lock, or, if locker code is used for type then this is the student’s locker number |
Yes |
No, the code will be created upon import. If the code already exists, it will be updated with the new combination. |
|
Combination |
Locker combination |
No |
No, it will be created upon import. |
|
Term |
|
Yes If there is no term, it will be imported to the current term. |
Yes |
6. Save the file in .csv format.
7. On the portal's Admin
> Import page, select Lockers.
 .
.
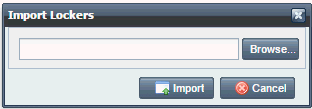
8. In the dialogue box, select Browse to select the file to import.

9. Select Import.
 |
NOTE:
|


