Create Association
Update Report: Public/Demographics/Functions
Use: Assign an Association to a group of accounts.
1. Select the report under the Query Builder's Update tab Public > Demographics > Functions > Create Association.
2. Select Preview.
3. Enter the values for the following prompts:
a. On the Criteria tab, select the criteria of which accounts will be added to the new association.
In the example below, all accounts with students that have a grade for the term RG2015 will be added to the association.

b. On the Update Parameters tab, select the association to which to add the accounts:
-
Association Type (required) - choose the association that the accounts selected above will receive.
-
Association Sub-Type Code - if applicable, select a sub-categorization of the association.
-
AddUser (required) - select your 360° user login to log the data.
-
FreeFormNote - comments may be entered which will be saved as the association comment on each of the accounts.
In the example below, the accounts will be added to the association PR1 with a sub-type of 2015.

4. Click Done.
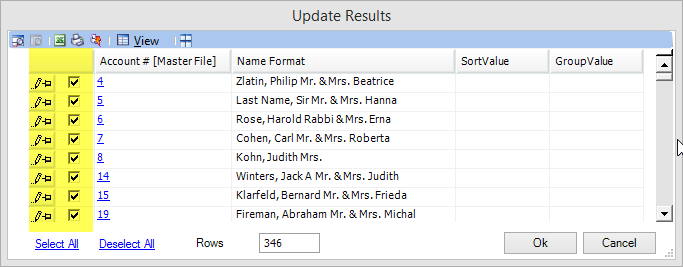
5. A list of all accounts that fit the criteria selected above will display. Accounts may be unchecked in the first column to exclude them from receiving the association.
When the list is verified, click OK to add the association to the accounts.
Note: If an account already is assigned the association, it will not be assigned it again.


