Create Rotation Schedule
The Rotation Schedule generates the period schedule for each day of the selected school term. The schedule type for each date will be created and can then be viewed or edited in Tools > Code Setup > School > Schedule > Rotation Schedule.
The Rotation Schedule must be run separately for each division.
1.
To get started, log into 360° and navigate to Tasks panel. Select the Create
Rotation Schedule icon. 
2.

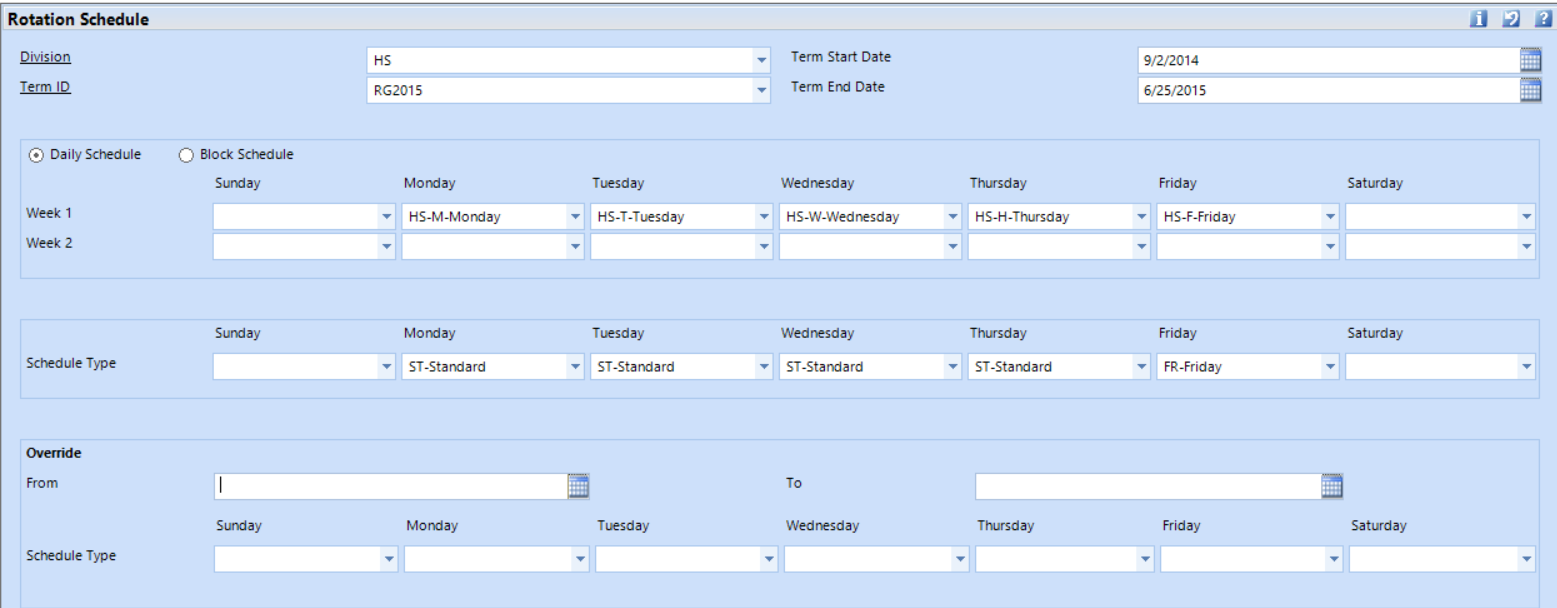
Select the Division, Term, Term Start Date and Term End Date.
 |
Note: The start and end dates will be automatically filled in based on the semester dates. These dates can be changed in order to run the rotation schedule for only part of the school year.
|
3. In the Week 1 row, fill in the rotation names for each day. If you have a 2 week schedule,, fill in Week 2 as well. If each week's schedule is the same, leave Week 2 empty.
4. In the Schedule Type section, select the bell schedule that each day of the week follows.
5. In the Override section, select a group of dates when the bell schedule is different than the normal Schedule Type. For example, if there's a period of a few weeks where the schedule one day follows a different bell schedule, is shorter or longer, etc., specify it here.
6. Click Finish to generate the rotation schedule for this division.
 |
If there any exceptions for specific dates, they can be manually adjusted in Tools > Code Setup > School > Schedule > Rotation Schedule after the rotation schedule is generated.
|


